Arduino 1.0.5 and Atmel templates for Qt Creator 3.0.1 and Ubuntu 14.04
This article explains how to install Arduino Templates for Qt-Creator. This tutorial is based on the following versions of software:
- Ubuntu 14.04 LTS
- Arduino 1.0.5
- Qt Creator 3.0.1
Install packet
First, launch a terminal (ctrl-alt-t) and install Qt Creator:
sudo apt-get install qtcreatorNow install Arduino core:
sudo apt-get install arduino-coreInstall Arduino Makefile:
sudo apt-get install arduino-mkIn the same way, install GTK terminal:
sudo apt-get install gtktermInstalling the templates
Download and extract this archive:
Arduino and AVR template for Qt Creator
Copy folders in the Qt Creator Template directory:
cd path/to/downloaded/archive
sudo cp -R atmega/ /usr/share/qtcreator/templates/wizards/
sudo cp -R arduino/ /usr/share/qtcreator/templates/wizards/
Change read-acess rights for any user to the template folder:
sudo chmod -R 755 /usr/share/qtcreator/templates/wizards/arduino/Start or restart Qt Creator for the new templates to be available:

USB rights
Some programming devices like AVRISPmkII requires rights on USB devices. This can be done by adding a rules file (provided in the archive):
sudo cp 60-avrisp.rules /etc/udev/rules.d/For changes to be applied, restart USB services:
sudo service udev restartNote that if an AVRISPmkII device is connected, unplug and replug.
Add the current user to the dialout group:
sudo usermod -a -G dialout $(whoami)Close your session to apply changes.
Qt Creator project configuration
Previous steps have to be done only once. But the following has to be done every time a new project is created. Create a new Arduino project through the Wizard. Once the project is created, go in the menu Tools>Option, change the terminal to xterm:

In the project Tab (left of the screen) select Build Settings. Add /src at the end of the build directory :

In build steps (if it not already done) select make all:
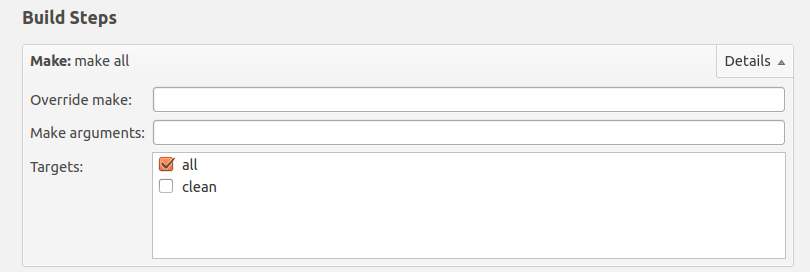
In Clean steps, select make clean:

Go to the second tab : Run Settings, and set the following parameters:
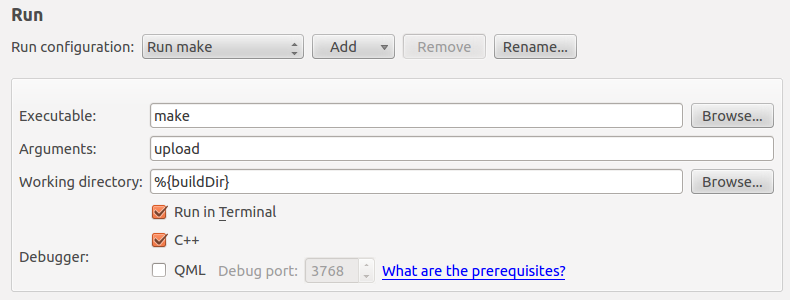
Click run, the program should compile and upload in the Arduino.
Acknoledgments
Thanks to Mauro Giampieri for his proposal and improvements.
See also
- Arduino based accurate distance measurement for Sharp GP2Y0A02YK
- Arduino based accurate distance measurement for sharp GP2Y0A21YK
- Arduino serial echo
- Arduino: serial terminal on TFT display
- OV7670 camera and arduino
- How to install Arduino IDE 2.0 on Ubuntu 20.04
- How to install Arduino IDE on Ubuntu 18.04
- QR code orientation With Arduino Nicla Vision
- Radino RF233 in Arduino IDE
- Un Arduino or une Arduino ?