Adding copper pour in EAGLE
Create copper pour
The copper pour outline is drawn with the POLYGON command:

Select the POLYGON tool. If the copper pour needs to be attached to a net, you can enter the net name straight after selecting the tool and validate with the Enter key:
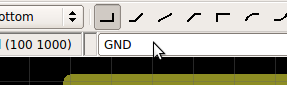
It is still possible to modify the connection by right clicking on the edge of the polygon, in the contextual menu, select NAME. In the pop-up window, replace GND by the label of the new connection. This is also useful to check that the connection has been successfully done.
Left-click to draw polygon edges and double click to close the polygon.
Once the outline is drawn, it appears in dotted lines:

Click the RATSNETS to calculate the copper pour:

The board should be updated. When the board is modified, the copper pour is not
always recalculated. It is usefull to remember that RATSNETS force the calculation
of the copper pour.

Board outline conflict
According to your design check rules, the copper pour may sometime not reach the board outline:

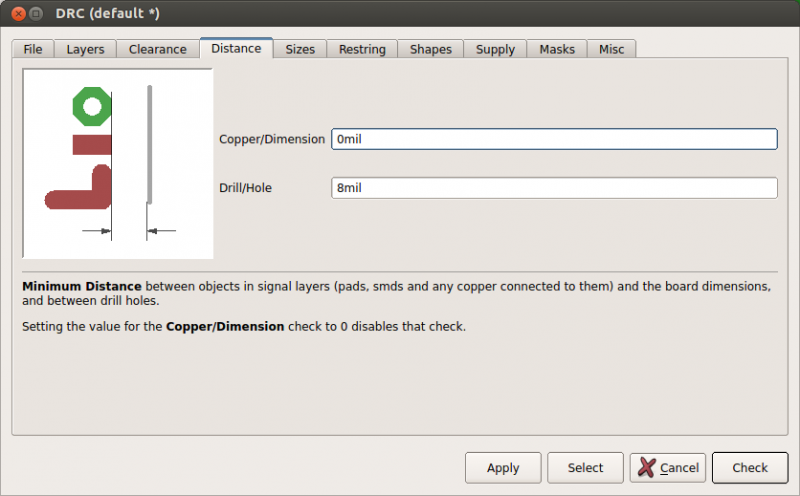
This can be solved by setting the distance between the copper pour and the dimension
layer equal to zero. Click on DRC, select tab Distance and set the distance equal to 0:
Attaching a net
Before attaching a net to the copper pour, it is sometime usefull to unroute the existing tracks already routed. Use the command RIPUP, for example “RIPUP GND”, to unroute all the tracks named GND.
To add or change the copper pour net attachment, select the NAME command and click on the polygon. A window pop up and the user can modify or specify the name of the copper pour. When the name is the same as an existing track (for example GND), an electric connection is automaticaly created between the track and the copper pour. On the following board, the copper pour is connected to the groung:

Remove copper pour
To definitively delete the copper pour, since the polygon is attached to the copper pour, delete the polygon. To temporary remove or hide the copper pour, select the RIPUP tool and click on the polygon. It removes the copper pour while keeping the polygon (dotted lines). Click RATSNETS again to recalculate the copper pour.
See also
- Adding mounting holes to a PCB with EAGLE PCB software
- Create Solidworks 3D model from EAGLE
- EAGLE Tutorial - Part 1 - Control panel
- EAGLE Tutorial - Part 2 - Schematic editor
- EAGLE Tutorial - Part 3 - Board editor
- EAGLE Tutorial
- Install EAGLE 6.6 on Ubuntu 16.04
- Understanding layers in EAGLE PCB Software
- Usefull EAGLE ULP scripts