Part 2. How to install Debian 11 with VirtualBox?
Introduction
This page is part of a full tutorial on how to install a web werver on a virtual machine. This second part of the tutorial explains how to install Debian 11 on a virtual machine with VirtualBox. It assume a virtual machine has already been created on the host computer. If not, please go to the previous page and follow the guide.
Download Debian image
Let's start by downloading the Debian image
Go to debian.org/download and download the last image.
In my case debian-11.5.0-amd64-netinst.iso.
Install Debian
Let's start our new machine and install Debian 11. Select your new machine, and click Start. The machine should start and a pop-up window should appears, requesting a start-up disk:

Click on the yellow folder and a new window appears.
Click Add and select the iso Debian file we downloaded previously.
Select the file debian-11.5.0-amd64-netinst.iso in the list and click Choose:

VirtualBox should come back to the previous menu. Now click Start. The Debian should start:

Since our purpose is to install a web server, we don't need a graphical interface. Let's choose Install. The installer ask for some informations like language, keyboard layout ... You can naviate in the menu with the following keys :
- Arrows to navigate in lists
- Tabulation for swithcing menu
- Space to check / uncheck checkbox
- Enter to validate
Select your language:

Select your country/timezone:

Answer the other questions, the installer should load additional components:

Once additional components are loaded, the installer ask for the hostname.
Since we are building a web server, lest's call our machine debianwebserver:

Leave the domaine name empty unless your server is intended to have a domain name:

The next step is quite important. The installer request a password for root.
Of course, you can set a root password, but if you set an empty password, this will activate the sudo commands.
For my web server, since no body else should access the virtual machine, I select this option because it's more convenient to manage the system.

Confirm the empty password in the next window.

The installer now request a new user instead of the root account. Specify the requested fields:
- Enter your real name
- Enter your username
- Enter the new username password
- Confirm the password

The installer now request the partition disks.

Select: Guided - use entire disk we use the full virtual disk create previously.
Select the disk, it may vary but it's probably sda or SCSI3 (0,0,0) (sda).
You should have only one option.
Select: All file in one partition, this is the default installation on disk.
Check the configured partitions and select Finish partitioning and write changes to disk:

Confirm your choice and accept writing changes to disks:

Your installation should start:

During installation, you may be asked for additional questions:

Select no, and then select the closest mirror location from your place. Do something for the environment, don't download packages from the other side of the world!
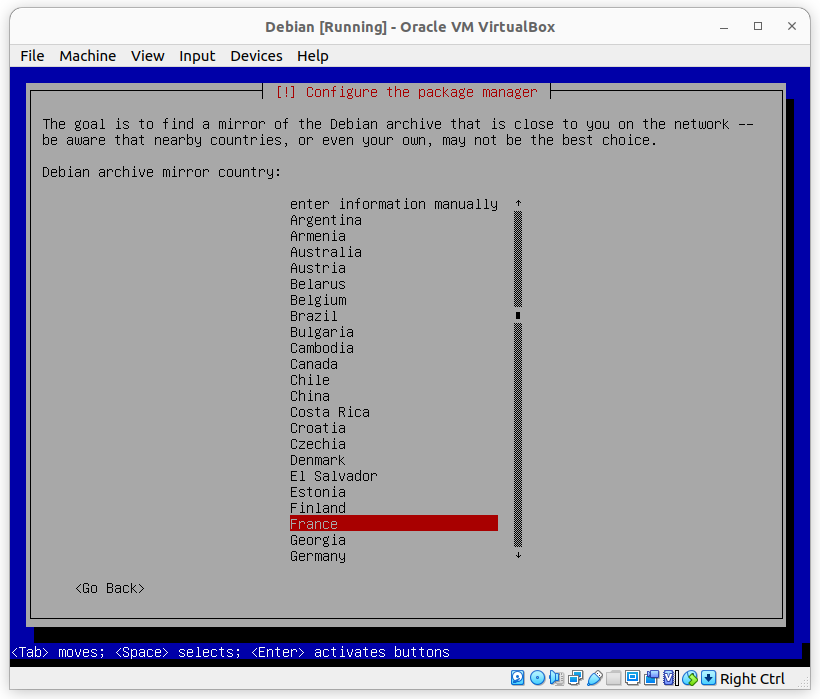
Select the mirror, don't select proxy, and continue the installation:

Select if you want to participate in the usage survey:

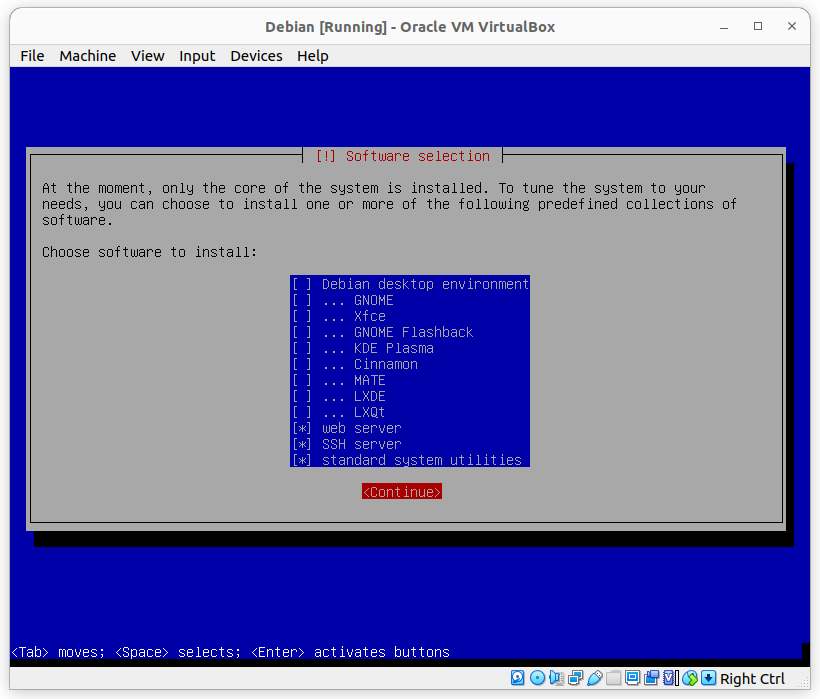
You should now reach the software selection. This step is important for our web server.
We don't need graphical environement for our web server, uncheck
- Debian desktop environment
- GNOME
From the installer, we can install the web server and SSH server, check:
- web server
- ssh server
The installer ask where to install GRUB. GRUB is the bootloader, this is a software that starts the operating system. In our case, since we only have one operating system on the machine, let install on the primary drive:

Select /dev/sda:

This was the last step. Let the installer finishing the installation (it may take a while, please be patient).
When the installation is completed, the installer ask you to remove the installation media. Since Debian was installed on a virtual machine, you have nothing to do, just select Continue.
The Debian should restart and display the login prompt:

Enter your login and password, your Debian is operational:
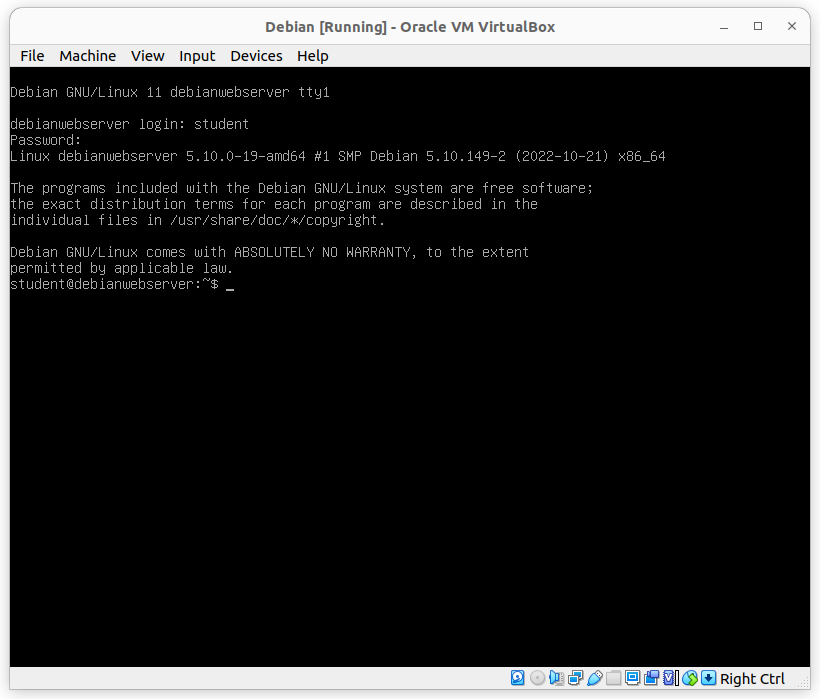
Our Debian is ready. Let's now configure Apache.
See also
- How to configure php.ini on AWS EC2 Cloud9?
- How to create a fresh AWS Cloud9 environment?
- How to install a virtual XAMPP web server on Lubuntu
- How to install a web server on Debian 11 with VirtualBox
- How to install and configure Xdebug on Ubuntu?
- How to install CodeIgniter 4 on Amazon AWS Cloud9 server
- How to install phpMyAdmin on Ubuntu?
- How to configure and run Apache server on AWS EC2 Cloud9?
- How to upgrade PHP to 7.2 on ubuntu?
- How to upgrade PHP to 7.3 on ubuntu?
- How to upgrade phpMyAdmin on Linux?
- How to install MySQL and phpMyAdmin on AWS EC2 Cloud9?
- Part 1. How to create new machine with VirtualBox?
- Part 3. How to configure Apache on Debian 11?
- Part 4. How to install PHP on Debian 11?
- Part 5. How to install MariaDB on Debian 11?
- Part 6. How to install phpMyAdmin on Debian 11?
- Part 7. How to install an FTP server on Debian 11?